
Vinyl decals have become a popular means of personal expression and aesthetic enhancement in our modern world. Whether you're aiming to add flair to your vehicle, home decor, or personal gadgets, mastering the art of applying these decals can lead to professional and long-lasting results. But how do you achieve this? Well, just like any craft, the devil is in the details.
Decal Surface Choice
Your first step to vinyl decal mastery is selecting the right surface. The foundation you choose can be likened to the canvas for a painter – it's pivotal to the outcome. In simpler terms, consider the contrast between glass and brick. Glass, with its smooth, high-gloss finish, offers an ideal surface for vinyl decals. It's akin to sticking a label onto a mirror. On the other hand, brick is the polar opposite. Its uneven and gritty surface makes it a challenge, as the unevenness reduces the surface area the adhesive can cling to.
Get your own custom printed decals here.
Now that we understand the importance of surface selection let's delve into what works and what doesn’t.
Acceptable Surfaces: Smooth, glossy surfaces tend to be the most accommodating. Some of the best contenders include:
- Glass: Think windows or glass decor items.
- Metals: Especially those painted with a glossy enamel. Think about the smooth surface of some laptops or metal furniture.
- Vehicles: Those painted with a smooth, glossy enamel.
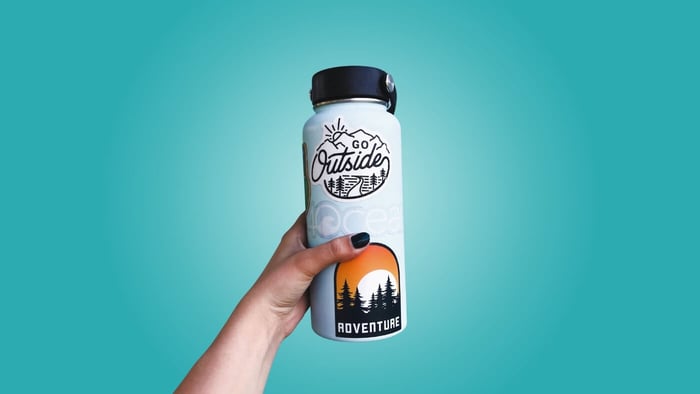
- Vinyl items: This includes banners, flags, and tents.
- Plastics and Acrylics: Items like certain storage containers or ornaments.
- Fiberglass and Wood: But only when they're painted with a glossy enamel. Remember, the smoother and glossier the surface, the better the vinyl will adhere.
Not-so-friendly Surfaces: On the flip side, certain surfaces can be quite hostile to vinyl decals. These include:
- Unfinished wood like chipboard.
- Paint that has oxidized or faded.
- Plastics with rough textures.
- Materials like rubber.
- Metals that have begun to rust.
- Anything that feels oily or excessively dusty.
Preparing Your Surface: A Clean Start
With your surface chosen, it's now time for the preparatory phase. The cleaner the surface, the better the adhesion. Every surface, no matter how clean it looks, should be given a thorough wipe down. Household cleaners might do an average job, but for optimal results, a solution of water and isopropyl alcohol is recommended. Once cleaned, dry it off with a lint-free cloth.
A small note on temperature: Vinyl tends to get finicky in the cold. For the best results, ensure your working environment, and the surface itself is above 55 degrees Fahrenheit.
The Application Process
Initial Placement: Begin by marking the specific area where you want your decal using a water-soluble pencil. This provides a guideline, ensuring your application is precise.
Now separate the decal from its paper backing by pulling off the transfer tape. This tape keeps all components of your sticker design together as you decide where to place it. Once you've found the perfect spot, press down on the transfer tape, securing the sticker. Then, use a credit card to firmly press over the entire design, ensuring it sticks properly. Lastly, peel back the transfer tape slowly, pulling it at a flat 180-degree angle to reveal your sticker perfectly in place.

Once the decal is firmly in place, give it a few minutes. This allows the adhesive to grip the surface properly.
For particularly detailed or intricate designs, you should consider waiting about 24 hours before taking off the transfer tape. This time allows the sticker to bond more tightly with the surface, guaranteeing a smooth removal of the tape without disturbing your design.
If you spot any air bubbles, don't worry. Tiny bubbles often vanish after a few weeks. If you're faced with stubborn or large bubbles, use a hairdryer to warm the area gently, and then puncture them with a needle, pressing down to smooth them out.
Wrapping Up
Applying vinyl decals is an art, but with patience and attention to detail, it can be mastered by anyone. Whether you're aiming for personal expression or aesthetic enhancement, with these detailed steps, your surfaces will soon boast professional and enduring results.
FAQs
- What surfaces are best for vinyl decals?
- Smooth, clean, and glossy surfaces like glass, certain metals, and plastics are ideal.
- How can I get rid of persistent air bubbles?
- Gentle heat from a hairdryer followed by puncturing with a needle should do the trick.
- What cleaning solution is recommended before applying the decal?
- A mix of water and isopropyl alcohol ensures the best results.
- Does the ambient temperature affect the application?
- Yes, it's advisable to apply decals in an environment above 55 degrees Fahrenheit.
- Are household cleaning solutions enough for surface prep?
- They can work, but a water and isopropyl alcohol mix tends to be more effective.