
At CustomStickers.com, we’ve seen people apply decals to just about anything. They’re an easy way to decorate your favorite surfaces, from laptops and phones to water bottles and car doors. Our custom decals are made with premium vinyl, designed for both indoor or outdoor use, and can last 5+ years in most conditions. Some folks choose to feature a business name or store hours on a shop window, while others prefer a personalized decal for their phone case. Whatever your goal, here’s a straightforward approach on how to make a decal that suits your needs.
What Exactly Is a Decal?
A decal is a piece of vinyl with an adhesive backing, often printed in full color with UV resistant ink for outdoor use. In many cases, you’ll see them called custom vinyl decals, wall decals, or car decals. They come in two primary forms at CustomStickers.com:
Transfer Decals
- Transfer decals are adhered with transfer tape, which holds vinyl lettering or designs in place.
- Ideal if you want separate letters or shapes to stay aligned.
- Common for a company logo, business logos on windows, or short phrases in vinyl lettering.
Regular Decals
- Regular decals function like decal stickers, typically printed as one piece (and often die cut).
- Great for full color images, product labels, or custom car decals with detailed designs.
- They can be made with a gloss or matte finish, depending on your preference.
Both transfer decals and regular decals are durable and water resistant. With the right material and care, they’ll look sharp for a long time, whether they’re on car windows, water bottles, or laptops.
What You’ll Need to Make a Decal
- Design or Artwork
- Create something you love. It could be your own images, a brand logo, or custom text.
- Make sure it’s print ready artwork if you’re uploading it.
- We have decal templates you can customize, or you can use our online designer if you don’t have your own software.
Premium Vinyl
- We use high-quality vinyl for our decals so they’re water resistant and able to last outdoors.
- If you want to apply your decal on a vehicle or shop window, choose an outdoor-rated option with UV resistant ink.
Transfer Tape (If Needed)
- Required for custom transfer stickers. It keeps all the letters and shapes aligned for easy application.
Application Tool
- A squeegee or even a credit card helps smooth bubbles out.
- A hair dryer can help remove stubborn bubbles and make the adhesive more pliable.
A Clean and Smooth Surface
- Whether it’s a laptop lid or a car door, you want it free of dust and oils. Wipe it down and let it dry before applying your decal.
Designing Your Decal
The design process is one of the most enjoyable parts. Here are a few pointers:
- Decal Purpose: Are you labeling a business window with store hours, or decorating a water bottle for fun? Figure out the main goal before you start.
- Color vs. Single Color: If you want color decals with gradients or multiple hues, a regular printed decal might be best. If you like simple text or shapes, transfer decals made from one color of vinyl can look neat and professional.
- Size and Shape: Measure the surface. Nothing’s more annoying than discovering your decal won’t fit. Also consider whether you want a standard rectangle or a die cut shape that follows your artwork’s outline.
- Finish: Some people like a gloss finish for extra shine, while others prefer a matte finish to reduce glare.
Cutting and Printing
If you decide to print or cut your own decals at home, you’ll need a cutting machine and vinyl sheets, plus transfer tape for lettering. But many people prefer ordering from us directly. You upload your design, approve a digital proof, and then we handle production. We print and cut the vinyl, weed out the excess if it’s a transfer decal, and prepare it for shipping.
Production time varies, but most decals are ready to ship in a few business days. Larger quantities or complex designs might take a bit longer, so plan your order placement accordingly. We also provide different shipping options if you need your decals by a specific date.
Applying Your Decal
- Clean the Surface
- Use rubbing alcohol or mild soap and water to remove dust and oils.
- Let it fully dry, because moisture can affect adhesion.
Positioning
- For a single-piece decal, just hold it up to see where you want it. If it’s a transfer decal, align the tape edges with your surface.
- Sometimes we recommend marking reference points with painter’s tape to avoid crooked placement.
Peel the Backing
- For transfer decals, remove the paper backing so the decal stays on the transfer tape.
- For a regular printed decal, peel one corner and slowly separate the decal from its liner.
Apply the Decal
- Press it down gently but firmly. Use a squeegee, credit card, or even your fingers to smooth from the center outward.
- This helps push out air bubbles and keeps the vinyl flat against the surface.
Remove Transfer Tape (If Applicable)
- Carefully peel the tape at a low angle. Make sure the vinyl remains on the application surface.
- If any edge lifts, press it back down and go slower.
Check for Bubbles
- If you spot air pockets, try pushing them to the edge.
- For stubborn bubbles, a tiny pinprick may help release trapped air. If the vinyl is stiff, gently warm it with a hair dryer.
Durability and Care
Our decals from can handle long outdoors exposure. This is thanks to premium vinyl and UV resistant ink. These decals last well over five years on cars, and remain vibrant on water bottles that get washed often. Still, it pays to be cautious. If you’re applying them to a surface that’s frequently submerged or heavily scrubbed, try to handwash instead of machine-washing. If the decal edges lift over time, you can press them down again or replace the decal if it’s been there for a while.
To remove a decal, warming it slightly makes the adhesive more pliable. Peel slowly to avoid leaving residue. If you do have leftover glue, rubbing alcohol or a gentle adhesive remover can help clean it up. We also suggest testing a small patch first on walls or painted surfaces, just to be safe.
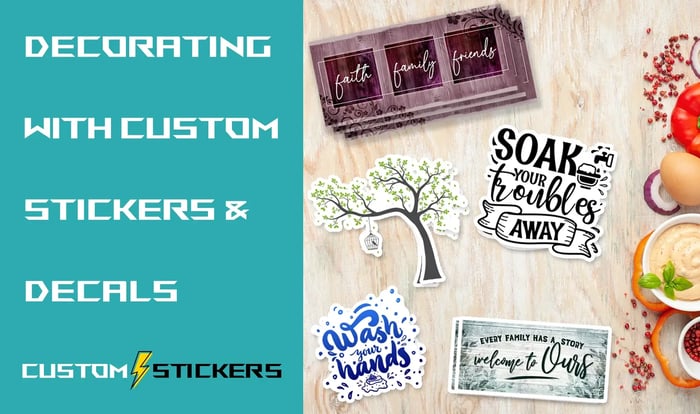
Common Ways to Use Decals
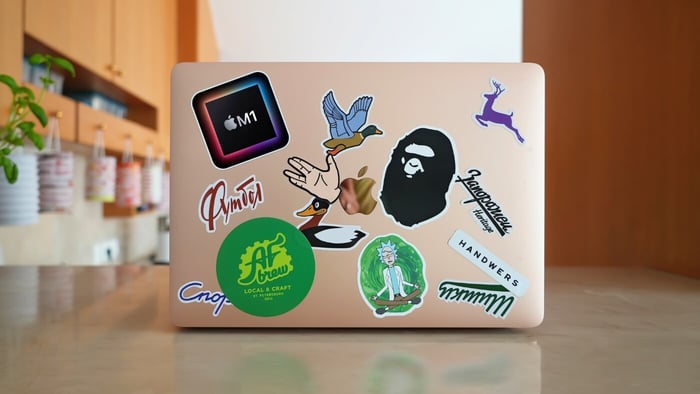
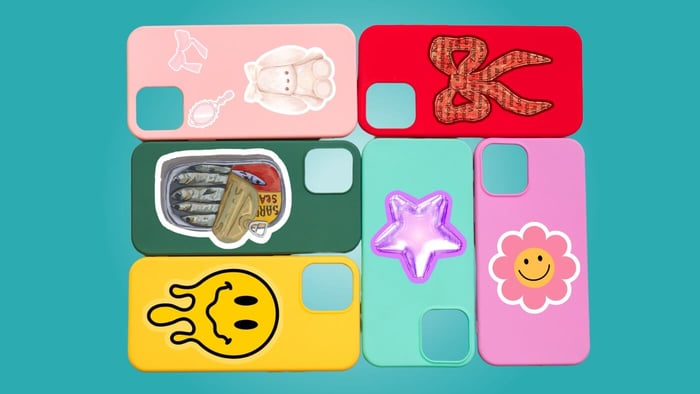
- Laptops and Phones: Turn a blank lid or phone case into something personal. Some people add a custom text quote or a small logo.
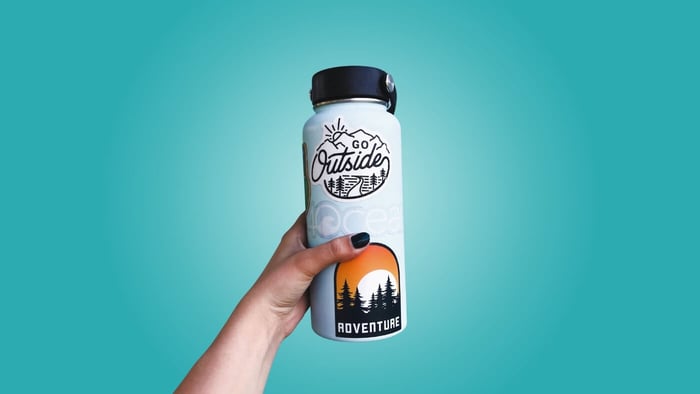
- Water Bottles: Great for labeling with your name or showcasing a design you love. The water resistant vinyl is perfect for this.
- Car Windows and Doors: Make custom car decals that feature your business name, social media handle, or a fun design.
- Business Windows: Display store hours, your shop’s name, or a company logo in vinyl lettering. Perfect for glass doors or windows.
- Wall Decals: If your walls are smooth, you can place decorative elements or large-scale text.
- Product Labels: Some small businesses use regular decals for packaging. It’s easier than custom printing boxes or bags.
Choosing Between Transfer Decals and Regular Decals
Transfer Decals
- Pros: Perfect for designs made up of separate letters or shapes. You can space them accurately and end up with a clean look.
- Cons: You can’t easily include a gradient or multiple colors unless you layer vinyl. It’s usually a single color approach (though you can choose from many vinyl colors).
Regular Decals
- Pros: Great for full color designs, photos, or anything that needs complex detail. We can print white ink, do matte finish or gloss, and even create die cut stickers shaped to your design.
- Cons: If you want separate letters floating on your surface, you won’t get that same effect without a transparent background.
Either way, the material is the same high-quality, durable vinyl. Choose the method that best fits your decal design. If you’re unsure, let us know. We’re happy to guide you.
Tips for a Good Result
- Plan Your Layout: Measure first. It’s easier to handle a correct-sized decal than to trim or reorder.
- Contrast: If your laptop is dark, try a lighter decal color, or consider a bright full color design.
- Order Extra Decals: Mistakes happen. Having a spare can save time and frustration if you misapply or tear the first one.
- Double-Check Shipping Method: If you need your decals quickly, consider faster shipping options. Our production time is usually a few business days, but plan for shipping as well.
Why Order from CustomStickers.com?
We try to keep the process simple. If you already have print ready artwork, just upload it and pick your specs—size, shape, finish, and quantity. We’ll send digital proofs so you can see how your decal will look. Once approved, we print, cut, and ship it. If you prefer a more hands-on approach, you can use our online designer to customize the layout or create custom text, even if you don’t have advanced design software.
For large or small orders, we do our best to match your timeline. Whether you need one personalized decal for a water bottle or a hundred business logos for your vehicle fleet, we can handle it. Some customers with bigger requests need more production time, but we’ll keep you updated.
DIY vs. Professional Printing
Some people enjoy making their own decals at home with a cutting machine, a roll of custom vinyl, and transfer tape. That’s totally fine if you’re comfortable with the process and happen to have a cutting machine. However, you should factor in weeding time (removing excess vinyl) and the learning curve. If you want a quick and polished result, or if you need large quantities, ordering through us might be simpler. We handle the complex steps so you can just peel and stick.
Making a Statement with Decals
Decals can do more than decorate a laptop or phone. They let you express your personality, promote your brand, or share important info like store hours. A custom vinyl design stands out, especially if you go with vivid color decals or unique shapes. If you don’t want something flashy, you can opt for subtle white ink on a clear decal or matte finish vinyl lettering. It’s all about finding a look that suits you or your business.
Final Thoughts
Making a decal for your laptop, phone, or water bottle is straightforward once you know the basics. You pick your design, choose the right vinyl format—transfer decals or regular decals—and apply it to a clean and smooth surface. Premium vinyl ensures your decal stays vibrant and durable, regardless of whether it’s sitting in the sun on a car door or getting splashed in the kitchen sink.
At CustomStickers.com, we love seeing customers transform everyday items into something special. We offer plenty of options for different finishes, shapes, and sizes, plus we handle the cutting and printing so you don’t have to. Whether you need a set of business windows labeled or just want to create your own decals for personal projects, we hope this guide helps you get it done. Feel free to browse our online designer or upload your artwork whenever you’re ready to make a decal that lasts.