
Learn how to create custom water bottle labels, they pull a table together fast. They make a graduation spread look intentional, give a baby shower a theme, and help a small business look buttoned up at markets or meetings. You don’t need special software or a print background to get it right. You just need a sensible size, a clean file, and a straightforward way to order. Here’s a clear, no‑stress process built around how things work on CustomStickers.com.
Pick a size that just works
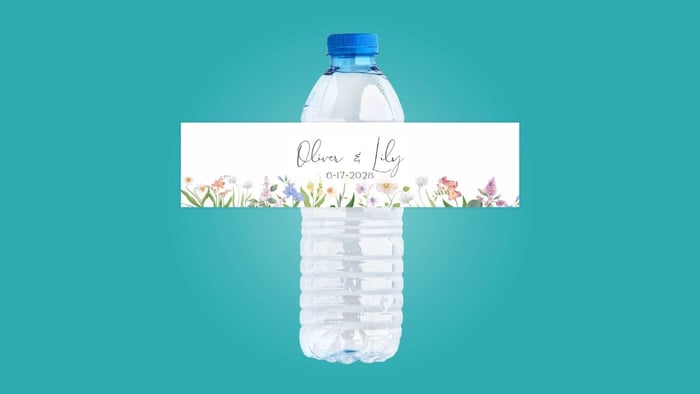
Use 2" × 8" as your default. It fits the flat band on most 16.9 oz bottles and keeps application easy. If you’re particular about the seam, wrap a strip of paper around your exact bottle, mark the overlap, and measure it; that’s your width, and the flat band between the ridges is your height. But if you don’t want to measure, 2" × 8" is the safe choice that looks clean and goes on without drama.
Set up and design your label in Canva or Photoshop
Keep file setup simple so printing stays predictable. Make a 2" × 8" canvas at high resolution and add a small bleed (⅛ inch) if backgrounds or images run to the edge. Keep important text in a matching ⅛‑inch safe margin so nothing gets clipped. If you’re using a logo, place a good‑quality file (vector if you have it) and stick with readable sizes—small type is fine, but don’t push it. For colors, you can work as you normally do; the key is to export a clean, high‑resolution file when you’re done. And if you’re adding a QR code, give it a little breathing room and make it large enough to scan at arm’s length.
In Canva, start a custom design at 2" × 8" and turn on rulers or guides so you can see the edges and that ⅛‑inch safety. Keep your layout straightforward: a clear headline, a secondary line, and any extras like a date or URL. If you place a photo or pattern, stretch it past the edge to cover the bleed. When it looks right, download a high‑quality PDF or PNG. If you’re wondering whether the text is big enough, print one page on your home printer first; a quick paper mockup beats guessing.
In Photoshop, create a new document at 2" × 8" and add the same ⅛‑inch bleed and safe area with guides. Drop in your art and logo, keep text layers live so they stay crisp, and avoid placing a face or a logo right on the seam—you’ll see it curve when the label wraps. Export a flattened PDF, TIFF, or PNG at full size. Same advice as Canva: make a fast test print on regular paper, wrap it around a bottle, and check spacing before you order. Two minutes now saves you from fixing little issues later.
A few simple design choices go a long way on a curved surface. Center your main message so it lands on the front, not at the seam. Give elements a bit of breathing room; dense layouts look busier once they wrap. And keep contrast high. Light text on a very dark background can look great, but if it’s tiny, it’s harder to read from a few feet away. You don’t need to overthink it—clear hierarchy and enough space for the wrap usually do the trick.
Order on CustomStickers.com the way that fits your quantity
For most projects, order through the Water Bottle Labels product on CustomStickers.com and enter your custom size—again, 2" × 8" is a smart default. Upload your file at print size and you’re basically done. If you measured a slightly different wrap or you’re doing a front label plus a small back label, type in the exact numbers and place the order the same way.
If you need a smaller run (under 250), use the Sticker Price Calculator. It’s perfect for short quantities, quick tests, or mixing a few designs without committing to a big batch. You still set the size you want (2" × 8" or whatever you measured) and upload the same file. This is handy for one‑off events, school nights, or a small business trying a few styles before picking a final look. In my opinion, this is the easiest way to experiment without over‑ordering.
And if your project needs a human touch—odd sizes, multiple versions packed together, a layout you want someone to sanity‑check—contact support. Tell the team which bottle you’re using, the size you want, and how many you need. If timing matters, say so. A short message with those details gets you a clean quote and a clear plan.
Apply labels so they look straight and stay on
Label bottles at room temperature, then chill them. That’s the whole trick. Cold bottles sweat, and moisture makes any label harder to apply well. Wipe the area where the label will sit with a clean, dry cloth, and if you want to be extra careful, a quick pass with a little isopropyl alcohol removes oils and dust. Set a few bottles on the counter facing the same way so your seams are consistent.
When you apply, start by tacking the center of the label to the bottle rather than lining up an edge first. Smooth one side around, then the other, and meet at the seam with intention—either a small overlap or a tiny gap, but not “almost.” Press firmly, especially at the seam. If you see a tiny bubble, a pinprick lets air out and it disappears with a thumb swipe. Give the adhesive a little time to build strength before dunking bottles in ice; labeling the day before an event is ideal, but even an hour makes a difference.
That’s really it. Keep the surface dry, apply with steady pressure, and let the labels settle before the ice bath. You’ll end up with straight seams, smooth wraps, and bottles that hold up on the table and in photos.
Where custom water bottle labels shine
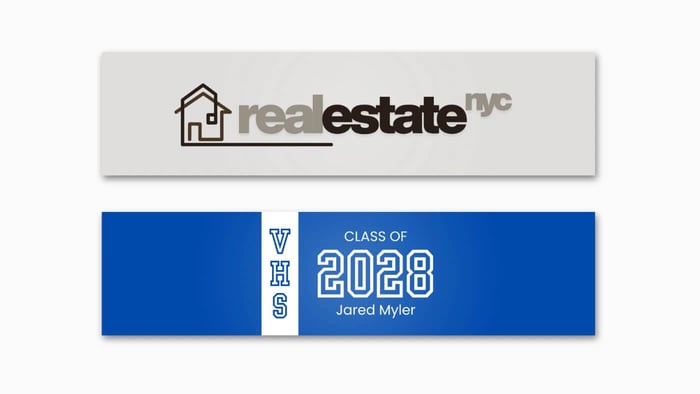
Use custom water bottle labels for any moment that deserves a little polish without a lot of work. Graduation tables and baby showers feel more put‑together when every bottle matches the colors and the theme. Community events like 5Ks or school nights get a quick hit of identity with a logo and date. Small businesses can carry their brand into meetings, pop‑ups, and trade shows in a way that feels friendly but still professional—hand someone water with your logo and a URL, and you’ve made a small, memorable touchpoint. And if you’re just hosting family this weekend and want the cooler to look nice, you can make a simple design in Canva, order the size you need, and call it good.
Bottom line: choose 2" × 8" unless you’ve measured something different, set up a clean file in Canva or Photoshop, order through the Water Bottle Labels product (or use the Sticker Price Calculator for quantities under 250), and apply to dry bottles before chilling. Do that and your custom water bottle labels will look the way you planned—simple, neat, and ready for the party or the booth.