
Table of Contents
- Start With The Theme First
- Decide How The Stickers Will Be Used
- Keep The Design Simple
- Choose The Right Size And Shape
- Matte Vs Glossy: Which Finish Looks Better?
- Use Photos Carefully
- Prep Your File The Right Way
- Think About Where The Sticker Will Actually Go
- Avoid These Common Design Mistakes
- Our Best Advice For Custom Bachelorette Stickers
- Conclusion
A great bachelorette party usually has a few things in common. It has a clear theme, a few running jokes, and at least one detail that shows up everywhere. That is where custom bachelorette stickers really shine. We use them on welcome bags, water bottles, party favors, mirrors, cups, gift boxes, and just about anything else that needs a little more personality.
And the best part is this: they do not need to be complicated.
When we help customers design custom bachelorette stickers, the strongest designs are usually the simplest ones. A short phrase. A fun icon. A color palette that matches the weekend. That is enough to make the whole party feel more put together. You do not need to cram every inside joke, every date, and every itinerary detail into one little sticker.
If you are trying to figure out how to design custom bachelorette stickers for your party, here is how we recommend doing it.
Start With The Theme First
Before you open Canva, Illustrator, or any other design tool, decide what kind of party you are actually throwing.
That sounds obvious, but it matters. A beach weekend, a Nashville trip, a cabin trip, and a glam city weekend should not all have the same sticker style. If the party has a soft, coastal look, the stickers should feel light and clean. If the whole weekend is disco balls, cowgirl hats, and champagne, then the sticker design should lean into that.
We always tell people to start with four basic choices:
- your main phrase
- your main icon
- your color palette
- your overall vibe
That gives you a solid direction without making the design feel crowded.
For example, if your theme is Bride’s Last Disco, your sticker might use a disco ball, retro type, and pink or silver tones. If your theme is more relaxed, like a beach or spa weekend, you may want script lettering, softer colors, and simpler shapes. If it is a western party, boots, hats, stars, and bold lettering usually work better than delicate floral details.
The goal is not to make the sticker say everything. The goal is to make it feel like it belongs to the weekend.
Decide How The Stickers Will Be Used
This is where the design starts to get practical.
Before you build the artwork, think about where the stickers are going. That changes the size, shape, and layout more than people expect.
If you want one main sticker that guests can put on tumblers, coolers, laptops, or phone cases, we usually recommend a die cut sticker. Die cut stickers follow the shape of the design, so they look more finished and more custom.
If you want multiple small designs together, then sticker sheets are often the better choice. That works well for welcome bags or party packs where you want a mix of mini graphics, names, icons, or short phrases on one sheet.
Here is the simple version:
- Die cut stickers work best for one main design
- Sticker sheets work best when you want a variety pack
- Kiss cut stickers work well if you want an easier peel with backing around the design
When customers are not sure what to choose, we usually ask one simple question: do you want one hero sticker, or do you want a set? That usually clears it up fast.
Keep The Design Simple
This is probably the most important part.
A sticker is small. It has to read fast. If someone needs to stop and study it, the design is probably doing too much.
We recommend keeping custom bachelorette stickers focused on one main idea. That could be:
- the bride’s name
- a short party phrase
- the destination
- the year
- one strong icon or illustration
That is usually enough.
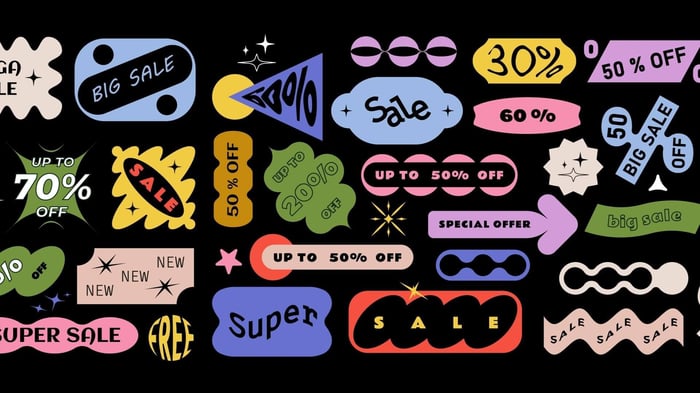
Some phrases work especially well because they are short and easy to read. Things like Bride Tribe, Last Disco, Let’s Go Girls, Final Fiesta, Last Toast on the Coast, or Skiing Before the Ring all make sense quickly. Once you have the main line, you can add smaller details underneath if you want, like the city, the date, or the bride’s name.
But the main phrase should always do the heavy lifting.
We also recommend using bold, readable fonts. Fancy script can be nice in small doses, but if every word is in a swirly font, the sticker gets hard to read. A good sticker should still work at a glance when it is stuck on a bottle or tossed into a welcome bag.
Choose The Right Size And Shape
For most bachelorette stickers, we usually see the sweet spot land around 2.5 to 3 inches. That size is big enough to show off the design, but small enough to fit on water bottles, cups, mirrors, favor bags, and other party items without taking over the whole surface.
The shape matters too.
If the artwork is built around one clean graphic, a custom die cut shape usually looks best. If the design is text-heavy or photo-based, a circle, oval, square, or rounded rectangle can sometimes work better. There is no single perfect answer. The best shape depends on the art.
Here is how we usually think about it:
- Circle stickers feel clean and classic
- Square or rounded square stickers work well for simple layouts
- Die cut stickers feel more custom and more giftable
- Sticker sheets are great when you want multiple small shapes together
If you are unsure, this is where proofing helps. We can show you how the cut line looks before anything goes to print, which makes it much easier to catch issues early.
Matte Vs Glossy: Which Finish Looks Better?
This comes up all the time, and the answer depends on the look you want.
If you want the colors to feel brighter and more reflective, glossy is usually the stronger choice. Gloss works really well for bold party designs, especially if you are using bright pinks, deep blacks, metallic-style gradients, or punchy illustrations.
If you want a softer look, matte is a great option. Matte tends to feel a little more subtle and a little more modern. It also cuts glare, which can help when your design uses small text or lighter colors.
We usually think about it like this:
- choose glossy if you want bold and vibrant
- choose matte if you want smooth and understated
Neither one is wrong. It just depends on the mood of the design.
For bachelorette stickers, gloss is often the first pick because it feels a little more lively and party-ready. But matte can look really good for more refined themes or text-heavy designs.
Use Photos Carefully
Photo stickers can be great for bachelorette parties. Face stickers, photo booth style designs, and bride cutout stickers can all be a hit. But photo-based stickers only work well if the image is clean.
If you are using a photo, make sure it is sharp, well lit, and large enough to print clearly. Blurry screenshots and tiny cropped images usually do not hold up well in print. If you want the sticker to follow the outline of the person or object, a clean background or a transparent cutout will make a huge difference.
If the photo has a messy background, the sticker can start to feel cluttered fast.
When we see photo stickers turn out best, it is usually because the design keeps the photo as the main feature and does not bury it under too much text.
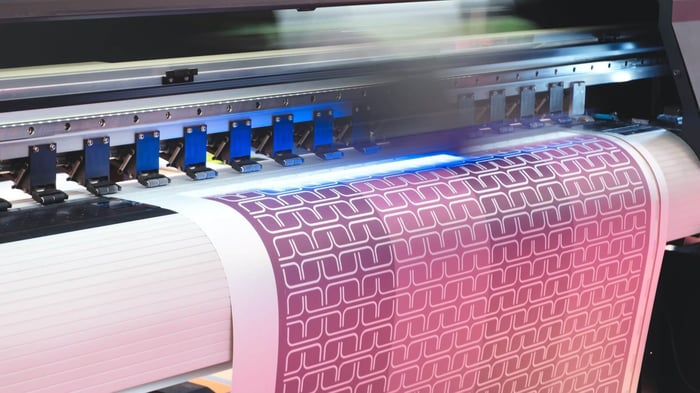
Prep Your File The Right Way
You do not need to be a designer to get this part right, but a few basic setup choices make a big difference.
We recommend sending artwork at full size and high resolution. 300 DPI is a good baseline for print quality. If you have vector artwork, that is even better, but we can also work with high-resolution raster files depending on the design.
If you are creating your own sticker art, these are the safest habits:
- keep your text away from the edges
- use a transparent background if you want a true die cut shape
- avoid tiny details that may disappear at small sizes
- make sure photos are high resolution
- export clean files, not screenshots
We can work with common file types like high-resolution PNG, JPG, SVG, AI, and EPS. If you are not completely sure whether your file is print-ready, that is fine. Send us what you have, and we can review it during proofing.
That proof step matters a lot. It is where we can check spacing, cut lines, sizing, and anything else that looks off before printing.
Think About Where The Sticker Will Actually Go
One of the easiest ways to design a better sticker is to picture where it will live during the party.
A welcome bag sticker may need a different layout than a water bottle sticker. A sticker for a compact mirror may need to be smaller and simpler than one meant for a tumbler or laptop. A sticker going on party favors may need to read quickly from arm’s length, while a sticker sheet can hold more detail because guests will be looking at it up close.
Some of the most common uses we see for bachelorette stickers are:
- welcome bags
- water bottles
- tumblers
- mini champagne bottles
- gift boxes
- mirrors
- favor packs
- hangover kits
Once you know where the sticker is going, the rest of the design gets easier.
Avoid These Common Design Mistakes
We see the same few issues come up again and again, especially with party stickers.
The first is trying to fit too much into one design. Too much text, too many icons, too many fonts, too many colors. That almost always hurts the result.
The second is choosing style over readability. We get it. Fancy fonts are fun. But if nobody can read the sticker, the design is not doing its job.
The third is using low-quality artwork. This one catches people off guard because the file may look fine on a phone screen, but print shows every problem.
And finally, people often forget to think about the cut line. A design may look good as a flat image, but once you add a contour cut, some layouts work better than others. That is another reason proofs matter.
Our Best Advice For Custom Bachelorette Stickers
If we had to boil it down, here is what we would say.
Pick one strong theme. Choose one main phrase. Keep the art clean. Match the size and shape to the way the sticker will be used. Then send us a solid file and let the proofing process help refine the rest.
That is usually the difference between stickers that feel random and stickers that actually pull the whole party together.
Custom bachelorette stickers should feel fun, personal, and easy. They do not need to be overbuilt. In fact, the simpler they are, the better they usually look.
When you are ready, you can upload your design, tell us how you want it cut, and we will help you turn it into something that looks great in real life, not just on a screen.
Conclusion
If you are wondering how to design custom bachelorette stickers for your party, start with the basics. Build around the theme. Keep the design simple. Choose the right format. Pick the finish that matches the vibe. And make sure the file is clean before you order.
That is the process we recommend because it works.
And if you already have a design in mind, we can help you turn it into custom stickers that feel like they belong with the rest of the weekend.