
Table of Contents
- What Are DTF Transfers?
- How To Make DTF Transfers: The Basic Workflow
- Step 1: Prepare Clean Artwork
- Step 2: Print Onto DTF Film
- Step 3: Apply Adhesive Powder
- Step 4: Cure The Powder
- Step 5: Pre-Press The Shirt
- Step 6: Heat Press The Transfer
- Step 7: Peel And Post-Press
- What You Need To Make DTF Transfers Yourself
- When To Order DTF Transfers Instead
- DTF Transfers Vs Custom Stickers
- Quick Checklist For How To Make DTF Transfers
- FAQs
TLDR
- DTF transfers are full-color heat transfers made by printing artwork onto film, adding adhesive powder, curing it and pressing it onto fabric.
- Learning how to make DTF transfers takes clean artwork, the right film, DTF inks, adhesive powder, curing equipment and a heat press.
- The most common problems come from low-resolution artwork, uneven powder, under-curing, poor pressure or peeling the film at the wrong time.
- If you want ready-to-press transfers without buying equipment, you can order custom DTF transfers from CustomStickers.com.
A shirt design can look clean on screen and still fail on fabric if the transfer process is off. That is why how to make DTF transfers is not just a printer question. How to make DTF transfers well starts before anything goes on film.
The short version: DTF stands for direct-to-film. You print the design onto special film, add hot-melt adhesive powder, cure the powder, then heat press the transfer onto a shirt, hoodie, tote or other fabric item. Once you understand that workflow, how to make DTF transfers becomes much easier to troubleshoot.
For many creators and small brands, the better first step is ordering ready-to-press custom DTF transfers instead of buying a full printer setup. You still get full-color artwork on apparel, but you skip the printer maintenance, white ink management, film handling and powder curing.
What Are DTF Transfers?
DTF transfers are printed heat transfers for fabric. The design is printed onto coated film with color ink and usually a white ink layer. Adhesive powder is applied while the ink is wet, then the print is cured and pressed onto the garment.
The white ink layer helps DTF work on dark shirts. It gives the design an opaque backing so colors stay bold instead of sinking into the fabric color.
DTF transfers are useful for custom shirts, hoodies, tote bags, uniforms, event apparel, team gear and brand merch. That is why how to make DTF transfers is such a common question for creators and small businesses. They are also a good fit for small batches because the process handles detailed full-color artwork without the cutting and weeding used for heat transfer vinyl.
How To Make DTF Transfers: The Basic Workflow
Here is how to make DTF transfers in the simplest form:
- Prepare the artwork.
- Print the design in reverse onto DTF film.
- Apply adhesive powder to the wet ink.
- Cure the powdered transfer.
- Pre-press the garment.
- Heat press the transfer onto the fabric.
- Peel the film.
- Post-press if recommended.
That list sounds simple, but the details matter. If you are learning how to make DTF transfers, treat each step like part of the final product. The real skill in how to make DTF transfers is keeping those steps consistent from one shirt to the next. A great print can still fail if the powder is uneven. A cured transfer can still apply poorly if the press pressure is wrong.
Step 1: Prepare Clean Artwork
The first rule of how to make DTF transfers is to start with a clean file. DTF can print detailed artwork, but it cannot fix a blurry design.
Use artwork that is high resolution at the final print size. In most cases, 300 DPI at size is a good target. If the design is a logo or text-heavy file, vector artwork is even better. For full-color art, a transparent PNG is often used because it keeps the design free-floating without a white box around it.
Before printing, check the file for:
- transparent background
- correct final size
- clean edges
- readable text
- enough contrast
- no unwanted white border or square
This is one reason people often order transfers instead of making them from scratch. If your main goal is how to make DTF transfers for a few shirts, file setup may be the only part you really need to handle yourself. A good supplier can review the file before production and help catch problems that may not be obvious on screen.
Step 2: Print Onto DTF Film
The next step in how to make DTF transfers is printing onto specialty DTF film. The image is usually printed mirrored so it faces the right way after pressing.
A DTF printer prints the color layer, then adds white ink as a backing layer. That white layer helps the transfer work on light and dark garments. It also gives the adhesive powder a surface to bond to.
This is not the same as printing on paper. You are making a heat transfer, so the ink must sit on the film correctly, bond with the powder and release cleanly during pressing.
If you are printing in-house, keep the film clean and dry. Fingerprints, dust and moisture can create defects. If you order custom DTF transfers the printing, white ink and film handling are already handled for you.
Step 3: Apply Adhesive Powder
Adhesive powder helps the printed design bond to fabric. It is applied while the ink is still wet.
For manual powdering, the powder is poured across the printed design, moved over the full image area and shaken off. The goal is even coverage. Too little powder can cause weak adhesion. Too much powder can leave rough edges or extra residue around the design.
This is where how to make DTF transfers starts to feel more like production than crafting. Powder coverage affects the feel, edge quality and durability of the final shirt.
Step 4: Cure The Powder
Curing melts the powder and bonds it to the printed ink. After curing, the powder should no longer look loose or dusty. Many printers describe the correct cured texture as slightly pebbled or orange peel.
You can cure DTF powder with a curing oven, conveyor dryer or heat press method, depending on your setup. Always follow the film, powder and ink supplier’s instructions. Settings vary by material.
Under-cured powder can feel grainy and may not bond well. Over-curing can make the transfer harder to apply or affect the feel. If you are figuring out how to make DTF transfers for repeat production, curing consistency is one of the most important things to dial in.
Step 5: Pre-Press The Shirt
Before applying the transfer, lint roll the shirt and pre-press the fabric for a few seconds. This removes moisture and wrinkles and gives you a flatter print area.
Do not skip this step. It is one of those small details people forget until a shirt comes out with a wrinkle, lint speck or uneven patch under the design.
For hoodies, bags and thicker garments, make sure seams, collars, zippers and pockets are not blocking pressure. Even heat and even pressure are both important.
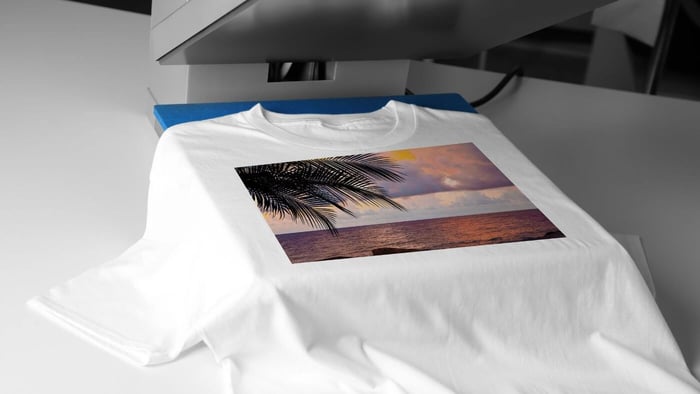
Step 6: Heat Press The Transfer
Place the transfer print-side down on the garment. The film will be on top, and the ink side will touch the fabric.
Heat press settings depend on the transfer, film and garment. Many DTF transfers use a short press time with medium to firm pressure, but you should follow the instructions that come with the specific transfer. The right settings are not universal.
If you order from CustomStickers.com, the custom DTF transfers made to arrive ready to press. That is helpful if you want custom apparel without managing the full process of how to make DTF transfers yourself.
Step 7: Peel And Post-Press
Some DTF transfers are hot peel. Some are cold peel. Some can be peeled warm. Use the peel method recommended for your transfer.
Peeling at the wrong time can lift the design or leave parts of the print on the film. If the transfer starts lifting, stop and repress according to the instructions.
Many transfers also benefit from a short post-press after the film is removed. Place parchment paper, a finishing sheet or a silicone sheet over the design, then press again for the recommended time. A post-press can improve the feel and help the design settle into the fabric.
What You Need To Make DTF Transfers Yourself
If you want to learn how to make DTF transfers from start to finish, you need more than a standard printer.
A full setup usually includes:
- DTF printer with CMYK and white ink
- DTF film
- RIP software for white ink control
- DTF adhesive powder
- powder shaker or manual powdering station
- curing oven, conveyor dryer or heat press curing setup
- heat press
- parchment or finishing sheets
- test garments
The setup can make sense for apparel shops or brands producing transfers often. But if you only need a few shirts, transfers for a team order or a small merch drop, it is usually easier to order ready-to-press transfers. The practical answer to how to make DTF transfers may be to prepare the artwork well and let a production shop print the transfer.
When To Order DTF Transfers Instead
Learning how to make DTF transfers is useful, but not every project needs a full DTF setup. The question is not only how to make DTF transfers, but whether making them yourself is worth the equipment, testing and maintenance.
Order custom DTF transfers when you want a small run of custom shirts, full-color merch without buying equipment, consistent results across a batch, fewer setup steps or a simple way to press your own apparel.
CustomStickers.com offers custom DTF transfers in several sizes, including 4" x 4", 6" x 6", 8" x 8", 10" x 10", 11" x 11" and 12" x 12". You can choose a size and quantity, upload your artwork and receive transfers that are ready to apply.
That makes the process cleaner for creators, small businesses, events and teams. You still get custom apparel, but you do not have to learn every technical detail before your first order. For many first projects, this is the easiest version of how to make DTF transfers: upload good art, order the transfer and press it correctly.
Custom DTF Transfers | T-Shirt Transfers

$9.99
Bring your artwork to life with vibrant, full-color prints that press cleanly onto cotton, polyester, and blends. Our custom DTF transfers deliver sharp detail, smooth gradients, and a flexible finish that holds up wash after wash—perfect for merch drops, team… read more
DTF Transfers Vs Custom Stickers
DTF transfers and custom stickers both start with artwork, but they are for different surfaces.
DTF transfers are for fabric. Use them for shirts, hoodies, tote bags, uniforms and apparel.
Custom stickers are for hard surfaces. Use them for laptops, water bottles, packaging, jars, notebooks, windows and giveaways.
The two products work well together. A creator can sell shirts with DTF transfers and include matching stickers in the package. A small brand can use the same logo on apparel, product labels and thank-you inserts. The artwork feels consistent, but each product is made for the right surface.
Quick Checklist For How To Make DTF Transfers
Before you print or press, use this checklist:
- artwork is high resolution at final size
- background is transparent
- design is mirrored before printing
- film is clean
- powder coverage is even
- powder is fully cured
- garment is lint rolled
- garment is pre-pressed
- heat press settings match the transfer instructions
- pressure is even
- peel timing matches the transfer type
- post-press is done if recommended
If you searched how to make DTF transfers because you want fewer failed shirts, this checklist is the practical answer. It keeps you from guessing at every step. Get the file right, get the powder right, get the press right and test before running a batch.
FAQs
Why Learn How To Make DTF Transfers?
Learning how to make DTF transfers helps you understand artwork setup, press settings, peel timing and when ordering ready-to-press transfers makes more sense than printing in-house.
Can I Learn How To Make DTF Transfers At Home?
Yes, you can learn how to make DTF transfers at home, but you need DTF film, DTF inks, adhesive powder, curing equipment and a heat press. For occasional shirts, ordering ready-to-press transfers is usually easier.
What Is The Easiest Way To Learn How To Make DTF Transfers?
The easiest way to learn how to make DTF transfers is to start with ready-made transfers and practice pressing them. Once you understand placement, pressure, peel timing and fabric behavior, the full printing process is easier to evaluate.
Do I Need A Heat Press For DTF Transfers?
A heat press gives the most consistent result because it applies controlled heat and pressure. Some transfers may be applied with an iron, but an iron is less consistent and can create uneven bonding.
What File Type Is Best For DTF Transfers?
A transparent PNG is a common choice for full-color artwork. Vector files are excellent for logos and text. The most important thing is that the artwork is clean, high resolution and sized for the final print.
Is How To Make DTF Transfers Different From Normal Printing?
Yes. How to make DTF transfers is different from normal printing because the ink has to bond with adhesive powder, cure correctly and transfer to fabric under heat and pressure.
What Is The Biggest Mistake When Making DTF Transfers?
The biggest mistake is treating DTF like normal printing. DTF transfers need correct artwork, film, white ink, powder, curing, pressure and peel timing. Missing one of those steps can affect the finished shirt.
Can I Use The Same Design For DTF Transfers And Stickers?
Yes. You can use the same design concept for DTF transfers and stickers, but each product needs its own setup. A transfer file needs to work on fabric. A sticker file needs to be prepared for print and cut.