
Table of Contents
- TLDR
- How to Create a Wedding Welcome Table: Define Its Purpose
- How to Create a Wedding Welcome Table: Choose the Location
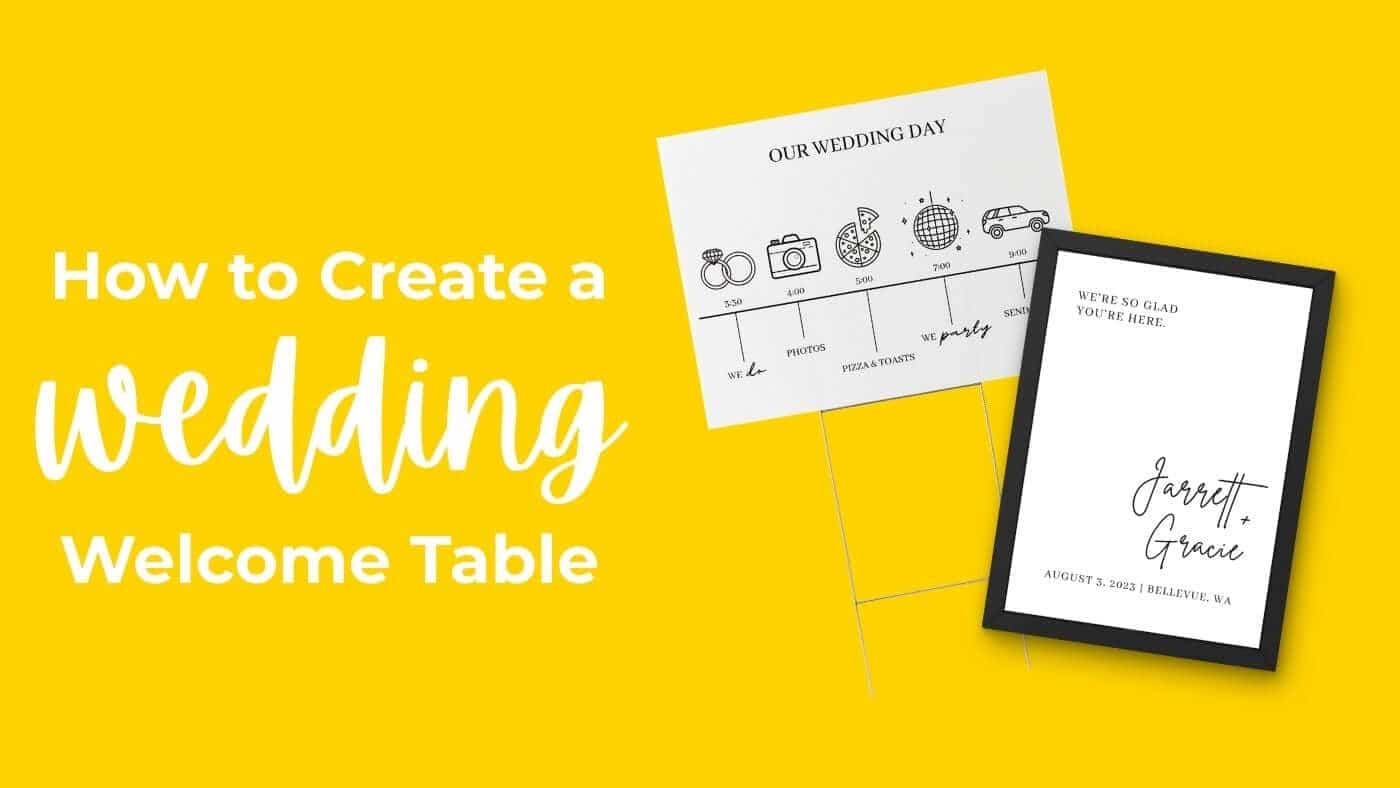
- How to Create a Wedding Welcome Table: Start With a Sign
- How to Create a Wedding Welcome Table: Add the Guest Book
- How to Create a Wedding Welcome Table: Add a Card Box
- How to Create a Wedding Welcome Table: Organize Seating
- How to Create a Wedding Welcome Table: Share Helpful Details
- How to Create a Wedding Welcome Table: Add Personal Details
- How to Create a Wedding Welcome Table: Build a Clear Layout
- How to Create a Wedding Welcome Table: Coordinate the Details
- How to Create a Wedding Welcome Table: Place the Favors
- How to Create a Wedding Welcome Table: Plan for Weather
- How to Create a Wedding Welcome Table: Assign a Helper
- How to Create a Wedding Welcome Table Without These Mistakes
- Wedding Welcome Table Checklist
- Frequently Asked Questions
- Make Arrival Feel Easy
- FAQs
TLDR
The easiest way to learn how to create a wedding welcome table is to plan around the guest experience. Place it where people naturally arrive, include a welcome sign, guest book, card box, and any information guests need next. Add a few personal details, but leave enough open space for people to stop, write, and place cards without creating a line.
A wedding welcome table is often the first part of the celebration guests see up close. It can introduce the wedding style, collect cards, direct people to their seats, and give them something to do while they wait.
But it can also become crowded quickly. The best approach to how to create a wedding welcome table is to treat it as a small guest-service station. Every item should welcome, guide, collect, or help guests participate.
How to Create a Wedding Welcome Table: Define Its Purpose
Before choosing flowers or frames, decide what guests need from the display.
A welcome table may:
Welcome guests to the ceremony or reception
Collect cards and small gifts
Hold a guest book or signing activity
Display escort cards or seating information
Share a schedule, wedding hashtag, or photo link
Distribute programs, favors, or welcome notes
Display photographs or family keepsakes
Learning how to create a wedding welcome table becomes easier when you choose two or three main jobs. A ceremony table may hold programs and a guest book. A reception table may focus on cards, seating assignments, and favors.
Not every item needs to stay in one place. A large seating chart can stand beside the table, while take-home favors may work better near the exit.
How to Create a Wedding Welcome Table: Choose the Location
A beautiful display will not help if guests walk past it.
Place the table near the natural arrival path, but not directly in a doorway or narrow hallway. Guests should be able to stop without blocking others. Leave room for wheelchairs, strollers, older guests, and groups arriving together.
When deciding how to create a wedding welcome table at a large venue, walk the route a guest will take from the entrance. Look for the first calm area where people naturally slow down.
Good locations include:
Just inside the reception entrance
Near cocktail-hour access
Beside the seating chart
Outside the ceremony space, weather permitting
Near the coat check
Avoid the bar, buffet, restroom entrance, and dance floor. Those areas already create traffic.
The Knot identifies welcome signs, card boxes, and guest books as the main items for a wedding gift or welcome table, with seating details, flowers, photographs, favors, and candles added when space allows.
How to Create a Wedding Welcome Table: Start With a Sign
A main sign reassures guests that they are in the right place and introduces the event style.
It may include:
The couple’s names
The wedding date
“Welcome to Our Wedding”
A short phrase
A direction or arrow
As you plan how to create a wedding welcome table, make the sign readable from several feet away. Decorative script can work for names, but instructions should use a clean font.
The main sign does not need to explain everything. Smaller signs can identify cards, favors, or the guest book.
Use a frame, easel, or weighted stand that suits the venue. Outdoor signs should be secured against wind.
How to Create a Wedding Welcome Table: Add the Guest Book
Traditional books still work, but couples also use photo books, audio guest books, postcards, maps, artwork, records, and playing cards.
Whatever you choose, guests should understand it immediately.
For an unfamiliar activity, add one short instruction:
“Leave us a note for our first anniversary.”
“Sign a card and place it in the box.”
“Pick up the phone and leave a message.”
“Add your name to our family tree.”
Part of knowing how to create a wedding welcome table is removing small points of uncertainty. Guests participate more often when they do not need to ask what to do.
Place two tested pens beside the book and keep backups nearby. Test the ink on the actual paper, photograph, wood, or acrylic before the wedding.
How to Create a Wedding Welcome Table: Add a Card Box
Even when most gifts come through an online registry, some guests will bring cards. Give them a clear and secure place for the envelopes.
A card box should accept common envelope sizes without making the contents easy to remove. Put it where a coordinator or trusted family member can keep an eye on it.
When planning how to create a wedding welcome table, label the box. A decorative trunk, birdcage, suitcase, or acrylic container may not look like a card box to every guest.
A small “Cards” sign is enough. You can personalize the box with the couple’s names, date, or monogram using custom wedding stickers. The same design can coordinate favor packaging, welcome bags, cups, and other wedding details.
Arrange for someone to move the cards to a secure location later in the event.
How to Create a Wedding Welcome Table: Organize Seating
A seating chart or escort-card display often sits near the welcome table because guests need it soon after arrival.
Alphabetical organization is usually easier than grouping names only by table number. Guests naturally search for their own name first.
If escort cards sit on the table:
Arrange them alphabetically
Leave room to pick them up
Use readable lettering
Make meal indicators clear
Ask someone to straighten the display
Understanding how to create a wedding welcome table also means knowing when a seating chart needs its own space. For a large guest list, use an easel or freestanding board beside the table. This prevents guests from crowding around small cards while others are trying to sign the book or leave an envelope.
How to Create a Wedding Welcome Table: Share Helpful Details
Guests may need a schedule, shuttle times, an unplugged-ceremony reminder, or a link for sharing photographs.
A small framed card can show:
Ceremony and reception times
Transportation details
Photo-sharing instructions
The wedding website
Restroom or coat-check directions
A reminder to take a program or favor
The practical answer to how to create a wedding welcome table is to keep each message short. Guests should not have to read several paragraphs at the entrance.
A custom QR code sticker can link to the schedule, wedding website, photo gallery, digital guest book, or transportation details. Put it on a small sign, welcome bag, card box, or favor.
Test the printed code with several phones and include a short written URL as a backup. CustomStickers.com notes that its QR code stickers can be personalized and added to party favors and event materials.
How to Create a Wedding Welcome Table: Add Personal Details
A welcome table is a natural place for photographs, heirlooms, and items that introduce the couple’s story.
Good options include:
Engagement photographs
Wedding photos from parents or grandparents
A family heirloom
A meaningful book
A map of important places
A favorite quotation
Florals that match the reception
When learning how to create a wedding welcome table, remember that personal items should support the functional pieces rather than hide them.
Use one or two photographs instead of many small frames. Choose one floral arrangement instead of scattering vases between cards and pens. Leave open space around anything guests need to touch.
Personal does not have to mean crowded.
How to Create a Wedding Welcome Table: Build a Clear Layout
A flat row of objects can look unfinished and may hide small signs behind the card box.
Create a simple hierarchy:
Place the welcome sign or tallest arrangement at the back.
Put the card box and guest book in the middle.
Keep pens, escort cards, favors, and instructions near the front.
Leave an open writing area.
Cake stands, acrylic risers, sturdy boxes hidden under fabric, and small easels can create height. Make sure each raised item is stable.
The design side of how to create a wedding welcome table is mostly about balance. Use height to guide attention, not to fill every empty inch.
Take a photograph from the guest’s viewing angle. Photos often reveal blocked signs, crooked frames, and clutter more clearly than standing directly in front of the table.
How to Create a Wedding Welcome Table: Coordinate the Details
Repeating a few details makes the display feel connected to the rest of the wedding.
Use the same:
Monogram
Color palette
Floral illustration
Font combination
Border style
Short phrase
Custom wedding stickers can carry the design across favor boxes, envelopes, water bottles, candles, card containers, and take-home treats.
CustomStickers.com allows couples to add names, dates, venue details, photographs, and custom artwork, then review a proof before printing.
Good coordination does not require putting the couple’s names on every object. A repeated flower, icon, color, or border can be enough.
When deciding how to create a wedding welcome table on a budget, use neutral frames and containers, then customize them with stickers, printed cards, ribbon, or removable inserts.
How to Create a Wedding Welcome Table: Place the Favors
The welcome table can hold favors, but it is not always the best location.
Place favors there when guests need them on arrival, such as:
Programs
Fans
Tissues
Sunglasses
Welcome packets
Ceremony bubbles
Place take-home favors near the exit or at each seat. This reduces the chance that guests forget them or carry them through the entire event.
If favors belong on the table, add a simple sign such as “Please take one.”
Knowing how to create a wedding welcome table includes thinking about timing. An item can be attractive and still be placed at the wrong point in the event.
How to Create a Wedding Welcome Table: Plan for Weather
Outdoor weddings add wind, heat, sunlight, and moisture.
Use weighted frames, enclosed card boxes, sturdy sign stands, and containers that will not tip. Avoid loose paper unless it is clipped or covered.
Keep chocolate, candles, photographs, and heat-sensitive favors out of direct sunlight. Have a backup location for rain.
As you decide how to create a wedding welcome table outdoors, ask when the venue allows setup and whether the display will remain sheltered. A table assembled several hours early may face different conditions than one placed shortly before guests arrive.
How to Create a Wedding Welcome Table: Assign a Helper
A wedding welcome table rarely stays exactly as it was styled.
Pens move. Escort cards shift. Programs run low. Cards pile up. Someone brushes against a frame.
Ask a planner, coordinator, attendant, or trusted friend to check the display before guests arrive and once or twice during the event.
That person can:
Restock programs and favors
Replace missing pens
Straighten escort cards
Secure the card box
Wipe spills
Answer questions
Move items after the ceremony
This is one of the most practical parts of how to create a wedding welcome table. It is not only decor. It is an active part of the event.
How to Create a Wedding Welcome Table Without These Mistakes
Putting too much on one table: Move large seating displays and take-home favors elsewhere when space is limited.
Using signs that are too small: Important information should be readable without leaning across the table.
Hiding the card box: Make it visible and label it clearly.
Forgetting working pens: Test the pens and pack backups.
Blocking guest flow: Do not place the table in a narrow doorway or beside another busy station.
Making everything decorative: The strongest approach to how to create a wedding welcome table is functional first.
Skipping a setup photo: Send the planner or setup team a reference image showing where every item belongs.
Wedding Welcome Table Checklist
Pack the following:
Welcome sign
Table linen or runner
Card box and label
Guest book or alternative activity
Tested pens and backups
Instruction signs
Seating chart or escort cards
Programs or schedule
QR code sign
Photographs or keepsakes
Florals or simple decor
Favors, when appropriate
Frames, easels, risers, and clips
Weights for outdoor items
Secure storage for cards
Setup reference photo
Name of the person checking the display
A labeled container for each group of supplies makes how to create a wedding welcome table easier for the people handling setup.
Frequently Asked Questions
What Goes on a Wedding Welcome Table?
A basic table usually includes a welcome sign, guest book, pens, and card box. It may also hold seating details, programs, favors, photos, flowers, or a QR code.
Where Should the Table Be Placed?
Place it along the natural arrival path near the ceremony or reception entrance. Keep it visible without blocking a doorway, hallway, bar, or other busy area.
Do I Need Separate Welcome and Gift Tables?
Not always. They can be combined when there is enough room for the guest book, card box, and other essentials. Large weddings may benefit from separate stations.
How Can I Create a Wedding Welcome Table on a Budget?
Use a venue-supplied table, neutral frames, a simple linen, printed signs, and one floral arrangement. Customize plain containers with wedding stickers instead of ordering every item with permanent printing.
Should Favors Go on the Welcome Table?
Put favors there if guests need them on arrival. Place take-home favors near the exit or at each place setting.
Make Arrival Feel Easy
The best answer to how to create a wedding welcome table is not to add more decoration. It is to make arrival simple.
Give guests a clear welcome, a secure place for cards, an obvious guest-book activity, and the information they need next. Then add a few personal details that connect the display to the rest of the wedding.
A well-planned table can be attractive without being crowded. More importantly, it helps guests settle in and begin celebrating.
FAQs
What Goes on a Wedding Welcome Table?
A basic table usually includes a welcome sign, guest book, pens, and card box. It may also hold seating details, programs, favors, photos, flowers, or a QR code.
Where Should the Table Be Placed?
Place it along the natural arrival path near the ceremony or reception entrance. Keep it visible without blocking a doorway, hallway, bar, or other busy area.
Do I Need Separate Welcome and Gift Tables?
Not always. They can be combined when there is enough room for the guest book, card box, and other essentials. Large weddings may benefit from separate stations.
How Can I Create a Wedding Welcome Table on a Budget?
Use a venue-supplied table, neutral frames, a simple linen, printed signs, and one floral arrangement. Customize plain containers with wedding stickers instead of ordering every item with permanent printing.
Should Favors Go on the Welcome Table?
Put favors there if guests need them on arrival. Place take-home favors near the exit or at each place setting.