How to make stickers with Cricut
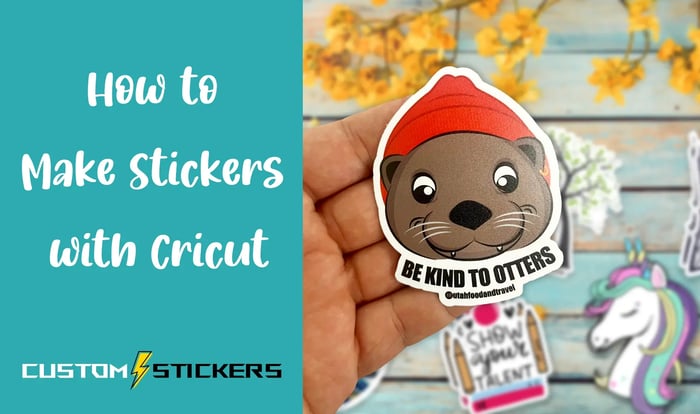
Today we are going to be talking about how to make stickers with Cricut at home. At Custom Stickers we love making stickers. Our team is made up of creators, designers, and crafters. Making stickers is fun and rewarding.
We make our stickers on commercial equipment that can produce thousands of stickers at a time. That said, a lot of us also enjoy tinkering and crafting at home by making Cricut stickers on printable sticker paper.
Sure, the durability won't match professional stickers, but it's still a lot of fun to make stickers with Cricut.
In this article, we will talk about how to make stickers with Cricut design space and a Cricut cutter.
Making your own stickers at home can be a fun and exciting hobby. With the help of a Cricut machine, you will find that the sky's your limit in design, size, and shape.
So let your creative juices flow and be the envy of all your friends.

Why Make Stickers with Cricut?
Homemade stickers with Cricut can be used to decorate a wide variety of items.
Homemade stickers can also be a great marketing tool for people with small businesses who want to improve brand awareness.
You can also test out different designs before you place a large order of Vinyl Stickers.
Stickers with Cricut are also fun for kids and families.
This Cricut tutorial will walk you through the complete process of how to create professional-looking stickers at home. From designing your stickers, what sticker paper to use, and how to use the print and cut feature in Cricut's Design Space.
How Does Cricut Help you Make Stickers at Home?
Cricut machines use a software called Cricut Design Space. This software has a feature called 'print then cut', which works in combination with your home printer.
This feature allows you to use any design or text, print it out using your printer onto special printed sticker paper, and then cut it out into any shape.
This feature only works with a Cricut Explore Air 2 or a Cricut Maker.
What Kind of Stickers Can I make?
Here are the common types of stickers you can make:
- Printed Sticker Sheets
- Die Cut Stickers
- Bumper Stickers
Printed Sticker Sheets - A printed sticker sheet is essentially a kiss cut sticker sheet. In other words, all of the designs stay on sheet, and the cricut cutting machine doesn't cut all the way through the stickers. You can see our kiss cut Sticker Sheets for reference.
Die Cut Stickers - A die cut sticker is a different style of sticker. The idea with die cut stickers is to cut all the way through the backing paper so they are cut to the shape of your design. Take a look at our vinyl stickers for reference.
Bumper Stickers - This is pretty obvious, these stickers are made to go on a car or other vehicle. Keep in mind that you will need to use vinyl sticker paper to make these. We also recommend laminating them. Otherwise, they'll fall apart in the rain and weather.
Learn more about the difference between die cut and kiss cut stickers.
What do you Need to Make your own Custom Stickers?
You will need a few pieces of equipment to create stickers at home. While some of this equipment is an investment, you can use it for many other projects and make some amazing stickers.
You will need:
- Sticker paper
- An Inkjet printer
- A Cricut Maker or Cricut Explore Air 2
- Cricut Design Space
Which Sticker Paper Should you Use?

You can use a few different types of sticker paper to create stickers at home. The best advice is to try a few other brands to find which style you like best.
Sticker paper comes in three types:
- Matte Sticker Paper
- Glossy Sticker Paper
- Vinyl Sticker Paper
The printable vinyl offers water resistance, but matte and glossy varieties should not be placed in water. Some people add a layer of clear vinyl or laminate over the top of their stickers to help make them more water resistant. However, bear in mind that this will make them thicker, and you may need to adjust your settings when using your Cricut. Thicker materials can wear down your fine point blade at a faster rate.
Cricut also sells its own Cricut brand sticker paper, but some people have found it slightly thicker than other sticker papers. Some folks report that their printers struggle to feed the Cricut printable sticker paper through smoothly.
Learn to start your own sticker business.
Which Printer do I Need to Make Stickers?
Having a high-quality full-color inkjet printer will help you create more professional stickers.
There are many different printers to choose from, do your research and choose a printer within your budget. You do not need to buy the most expensive printer to create amazing-looking stickers.
One thing to consider when looking at a printer are ink costs. If you plan to make a lot of custom stickers, a printer with a bulk ink system will save you money in the long run.
Epson sells several of these types of printers, and they are one of the best printer manufacturers out there.
Which Cricut Machine do I Need to Make Stickers?

There are three Cricut machines;
- Cricut Joy
- Cricut Explore Air 2
- Cricut Maker.
The Cricut Joy is the smallest of the three machines and does not support the print then cut feature.
The Cricut Explore Air 2 and the Cricut Maker are excellent choices for making stickers and support the print then cut feature of Design Space. Since you're here to learn to make your own stickers, we recommend either of these two options.
Learn more about choosing a Cricut machine.
Designing your Stickers
Once you have all your equipment ready, you need some designs to make into stickers.
There are various ways to create your sticker design.
You can create one from scratch using Cricut Design Space or programs such as Procreate or Photoshop, or you can purchase ready-made designs from Cricut Design space or websites such as Creative Fabrica or Etsy.
A cool website that a lot of crafters use is Design Bundles. It is a marketplace that offers relatively cheap bundles of custom designs covering all sorts of niches and themes.
You could also look at Stock options such as Shutterstock for your sticker images. You can get access to millions of high-quality designs.
Designing Stickers in Procreate
Procreate is an app downloadable onto Apple Ipads. It costs around $10.99 and is a comprehensive and versatile program used by many creators.
Stickers can be designed to fill the whole sticker shape or have a white border added for contrast. Save your designs as a PNG file, so it keeps their shape and transparency.
Designing Stickers in Design Space
Design Space is free to download and offers a way to design your stickers, eliminating the need for using any other software.
Design Space also has a library of over 100,000 graphics, fonts, and images if you sign up for their monthly subscription, Cricut Access, for $7.99 a month. In addition, there are a few free images and fonts you can use or purchase on an image-by-image basis, but this is not cost-effective in the long run.
Cricut Tutorial: How to make stickers
1. Using Cricut Design Space
First, open Cricut Design Space and open or upload your design or sticker image.
To upload your design, locate it on your computer and then follow the options on your screen. Design Space will upload your image as a single layer and can work with different complexities of the image. You can also delete areas of your image you don't want, e.g., the background from the layers panel.
On the last screen, before saving, make sure to select the 'save image as a print then cut' option.
You can then open your image on the canvas in Design Space.
You can add multiple designs to the same sticker sheet but make sure they are with the maximum size for print, then cut. This is 6.75" x 9.25" on 8.5" x 11" sticker sheets. The best way to ensure you are within the guidelines is to create a square from the shapes library and set it to 6.75" x 9.25".
Once you have your stickers arranged, delete the square shape, highlight all your stickers and click the attach button. This ensures your stickers stay in the same place during the print and cut process.

2. Printing out Your Design
Now you're ready to start making your stickers. Select the 'make it' button.
On the next screen, you'll notice a black box around your stickers. The Cricut sensors use this, so the machine knows where to cut.
Click next so you can send your stickers to print, and Design Space will also connect to your Cricut machine.
When you click print, a new window will appear where you can choose to 'add bleed' this means that the ink will extend slightly further than the edge of the image, make sure to turn this feature off if you want your sticker to have a white border.
You can also access your printer settings from this window, and it is recommended to adjust your settings to print at the highest quality.
Before printing, make sure you've added your sticker paper to the tray, and it is the right way up. Once printed, add your sticker sheet to your Cricut mat, ready to go in the Cricut machine.
Make sure to properly line up your sticker sheet on your mat; a light grip mat is ideal. If it is not placed straight, then your stickers may be cut out off-center. Make sure to remember your sticker sheet in the top left-hand corner.
If you are adding a clear laminate on the top of your stickers, add this now. Make sure the laminate doesn't cover the black sensor box as the shiny material will cause an error as the machine will not be able to recognize the black line.
3. Set up the Cricut Cutting Machine and Press Go!
Next, you need to tell your Cricut machine what material you are using during cutting. There are lots of different settings you could choose to cut your stickers, depending on the paper you are using and if you have added a laminated layer on top. Start with trialing the sticker paper setting.
Insert your mat with your Cricut sticker paper loaded by lining it up in the machine and pressing the arrowed button.
Now the fun part begins. Press go to start your machine scanning the black guidelines. Sometimes the machine fails to identify the black guidelines. The sensors work best in low lighting, place the lid of the machine down and move away from direct sunlight or lighting.
Watch your stickers being cut out. Once finished, peel them off the mat and use them however you like.

Tips and Tricks When Making Stickers
- If your stickers are cutting off-center and you have no idea why check your machine's calibration. Follow the instructions on Design Space to recalibrate your device.
- To stop any errors, make sure to create your print and cut file on one computer. Some people use computers and Ipads in conjunction with each other. This can cause the sensor lines to move around.
- You must place your sticker paper correctly on the mat and make sure that it is flat without any wrinkles. If it is set incorrectly, the sensors may not read the black lines, or your stickers may cut out off-center.
Conclusion
We hope we have given you a good understanding of how to make stickers with Cricut. Once you have made your first set of stickers, you won't want to stop. Creating stickers at home is a fascinating hobby with never-ending possibilities.
Creating your stickers allows you to explore your creative side and personalize items and gifts for friends quickly and easily. You can even use your homemade stickers to promote your small business by adding them as part of your packaging to develop your brand identity.
If you plan to sell your sticker designs, or you want to use them for outdoor use, we recommend buying them from us. We make the highest quality stickers in the market, and we have a best price guarantee so you know you'll get the best value.
Learn how to succeed at craft fairs.
Custom Vinyl Stickers

$41.00
Description Vinyl Stickers | Quality Vinyl Stickers By default we will die cut your vinyl stickers to the shape of your design. However, please add a note at checkout or request proofs if you would like standard shapes such as circles or… read more


