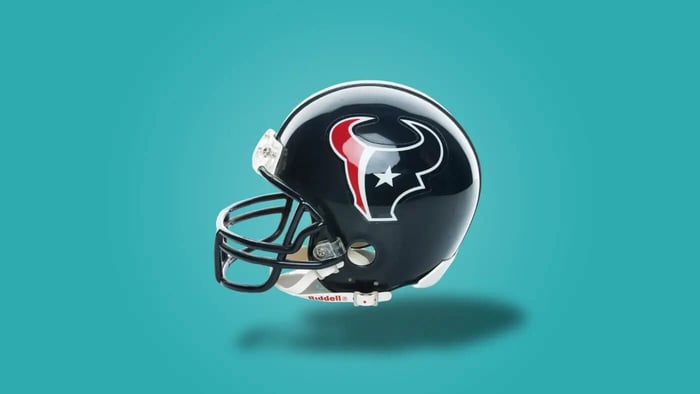

The difference between a helmet that blends in and one that turns heads usually isn’t the paint job. It’s the stickers. Numbers that pop on film, a crisp mascot on the temple, a reward decal earned after a big stop—these are the small details that change how a team is seen and how players feel when they buckle up. This article breaks down how to make custom football helmet stickers that look sharp on Friday night and still hold up in November.
What helmet stickers actually do on the field
Helmet stickers carry more weight than their square inches suggest. They project identity. A clean, consistent set of decals becomes shorthand for your program’s values—toughness, attention to detail, pride. Players feel that. Coaches know it. Parents notice it in photos. And opponents see it in warmups before a single snap.
They also communicate. Clear numerals let coaches and scouts pick up who’s doing what during live play and on film. If you’ve ever paused HUDL footage and squinted at a pile of bodies, you know why high-contrast numbers matter. Reward decals work the same way. They’re tiny performance receipts: a takeaway badge, a stripe for pancakes, a mark for special teams hustle. Earned stickers become a season-long story that’s visible every time a helmet tilts toward the huddle.
There’s a practical side, too. Good decals make battered helmets look uniform. Even when shells are from different production years or carry a few scuffs, consistent stickers bring the room together. That uniformity is culture you can see.
Design principles that read at game speed
Football moves fast. Your design has to be legible at 30 yards under stadium lights and within a frame or two on video. Start with contrast. Light-on-dark or dark-on-light outperforms clever but muddy color-on-color ideas. If your school colors don’t naturally contrast, introduce a keyline or halo. One thin border can be the difference between “lost” and “loud.”
Keep shapes simple. Complex outlines and hairline details break down when scaled small and viewed at a distance. A bolder mascot silhouette or monogram almost always reproduces better on curved plastic than a detailed crest.
Think scale and placement as a pair. Side decals should sit large enough to anchor the look without crowding ear holes or strap hardware. Numbers on the back bumper or crown must be tall and open in their counters (the “holes” in 6, 8, 9) so they don’t fill in with mud or glare. If you add stripes, mind the center seam and vent geometry; a slightly thicker stripe often tracks straighter down modern lids and is easier to align during installation.
Finally, be honest about finish. Gloss decals can mirror stadium lights; matte film mutes reflections and photographs more evenly. There’s no right answer—just make sure your choice serves the conditions you’ll play in most.
Materials and construction that last through the season
A football helmet is a tough surface. It’s curved, it flexes under heat and cold, and it gets knocked—often. That means your stickers need to be flexible, conformable vinyl with a durable topcoat. Look for a pressure‑sensitive adhesive that grabs without being so aggressive you can’t reposition during install. A good laminate on top protects the ink from abrasion and UV, keeping colors true through practices and road games.
Edge quality matters more than people expect. Clean contour cuts reduce the chance of lifting when facemasks graze the decal or when hands tug at helmets on the sideline. Rounded corners on small asset stickers (like reward marks) resist peel better than sharp ones. If you’re doing numbers or initials, prefer an outline path with enough stroke so you’re not weeding hairline vinyl that may lift later.
Curves are the enemy of flat materials, so plan for conformability. Larger decals that wrap toward the crown or jawline should be slightly simplified so you’re not forcing tiny tips to bend and stick on compound curves. If you’re using multiple pieces—say, a two‑part logo with a drop shadow—split the layers so each piece lays naturally.
If you want a quick primer that hits these basics in one place, their helmet-sticker guide covers materials and fit considerations without fluff.
A simple workflow: from locker‑room idea to helmet‑ready decal
You can keep this process straightforward, even during a busy season.
Start with vector artwork. An SVG, EPS, or AI file retains crisp edges at any size and cuts precisely. If all you have is a PNG, make sure it’s truly high resolution (think thousands of pixels, not hundreds) and has clean edges—no fuzzy antialiasing, no baked-in background. Keep colors to what you actually need; every extra hue raises the chance of slight mismatch against your helmet shells.
Choose sizes that reflect real viewing distance. Print paper mockups, tape them on a helmet, and step back to the far hash. Does the mascot read? Do back numbers look right under a top bar? This ten‑minute test saves a season of “I wish we’d gone bigger.”
Set a small safe zone around edges so hardware or vents aren’t forcing tight corners to float. If you’re doing stripes, measure centerline to accommodate both old and new models in your room. And if your team uses matte shells, test a small swatch first—some adhesives look perfect on gloss but need a touch more pressure on textured finishes.
When you order, ask for a digital proof to confirm scale and cut path details. Keep your first run modest, install on a few practice helmets, then commit to the full batch. If you’re still finalizing a look, order a small test set of die‑cut stickers so you can check sizing and curvature before you put the whole varsity set into production. That minor delay beats re‑ordering in Week 2.
And label your art files clearly—“Varsity_Side_Logo_4.25in.ai” is a lot easier to find next summer than “final_final_reallyfinal.ai.”
Application and maintenance that keep decals looking sharp
Preparation is most of the job. To prepare your helmets, clean each helmet with a mild detergent, rinse, then wipe down the sticker zones with isopropyl alcohol to remove sweat, wax, and residue. Avoid silicone polishes before install—they make decals want to skate. Dry completely. If you’re working in cold weather, bring helmets inside first; adhesives bond better when warm.
For placement, a simple hinge method works. Tape the decal in position along one edge, lift the sticker, peel the liner, and squeegee from the hinge outward using firm, even strokes. On compound curves, work from the center out and allow the vinyl to lay without forcing it. Use a soft felt edge or wrap your squeegee to avoid scuffing the laminate.
If bubbles appear, don’t panic. Tiny ones often outgas and disappear within a day. Larger bubbles can be vented with a fine pin prick at their edge; press the air toward the hole and smooth. Resist the urge to lift and restick large sections—once a corner is stretched, it’s more likely to lift later.
During the season, keep helmets clean with mild soap and water. Wipe dry after rainy games so water doesn’t sit along decal edges. If a corner starts to catch, a touch of heat from a hair dryer and firm pressure can re‑activate the adhesive. If a sticker is done, replace it quickly; one lifted edge tends to invite more.
And because it always comes up: many leagues allow decals as long as they don’t obscure safety markings or violate uniform rules. When in doubt, check your district or state association guidelines before you commit to a design that covers certification labels or critical warning panels.
In the end, the best helmet sticker package is usually the simplest one done well. A strong mark on the sides, numbers that read, a few smart reward decals, and stripes that align cleanly across every shell in the room. That’s what shows up on film. That’s what parents see in photos. And that’s what players notice when they pick up their gear before pregame. Small details, big impact—exactly what you want from a few square inches of vinyl.
Low-Quantity Die Cut Stickers | No Minimum

$8.99
Description Custom Die Cut Stickers | Waterproof Die Cut Stickers Die Cut Stickers are our best-selling product. Die cut means that we cut your stickers to the shape of your design. This gives them a fantastic look even before they've been applied. They… read more