Table of Contents
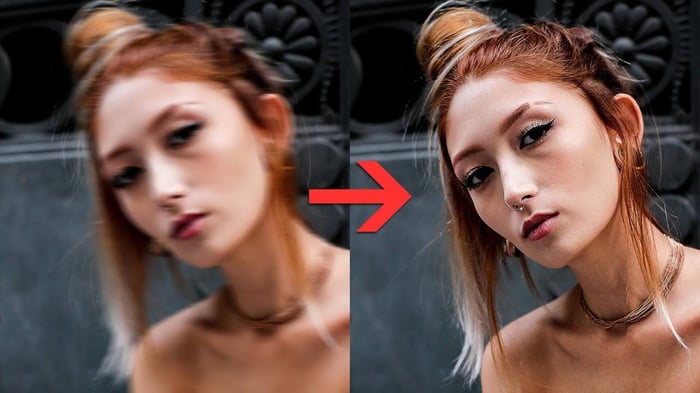
In the perfect world every shot would be sharp right out of the camera. As photographers we aim to take high quality in focus pictures. But we all make mistakes sometimes. Nothing is more disappointing than getting home and finding out your favorite shot from a recent shoot is blurry. But we have software to our rescue to save such images.
Today’s technology means a slightly blurry photo is not a dead end. If the focus is just slightly off and the photo has minimal blur you can still save it. This article will show you how to fix a blurry photo in Photoshop. So let’s get started.
Before we jump into the solution, let's first understand the problem. Why do photos get blurry? Blurry pictures are often the result of camera shake, out-of-focus subjects, or motion blur. Understanding these issues can help us fix them and prevent them in the future. So, when you notice your pictures are blurry, try to figure out what went wrong.
Fixing Blurry Pictures in Photoshop: A Step by Step Guide
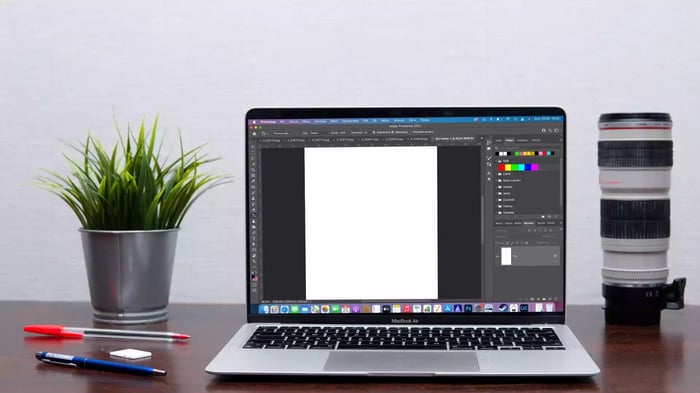
Step 1: Open in Photoshop
Open your blurry photo in Photoshop. Click on the lock button next to your photo layer in the Layers panel to unlock the background layer.
Step 2: Duplicate the Background Layer
With the photo layer selected use Command + J (Mac) or Control + J (PC) to duplicate the layer. This will create an identical layer that we can use to apply the sharpening. We can easily toggle between before and after or adjust the opacity to blend the sharpening perfectly. After duplicating your background layer the Layers panel should look like this.
Step 3: Use the Unsharp Mask
The Unsharp Mask is a way of sharpening in Photoshop that happens to work well for sharpening blurry pictures. To use the Unsharp Mask go to Filter > Sharpen > Unsharp Mask. Once you select Unsharp Mask a dialog box will appear. Change the amount to 150%, threshold to 0 and radius.
Step 4: Click OK and Make Final Adjustments
Once you have set the Unsharp Mask settings click OK. You can adjust the settings and make final adjustments on your photo. Toggle the layer on and off to see the difference the Unsharp Mask is making. Adjust the opacity slider in the Layers panel to reduce the effect if it’s too strong.
https://customstickers.com/community/blog/how-to-improve-image-quality-in-photoshop
More Tips for Fixing Blurry Pictures
In this section we’ll cover techniques such as layer masking in Photoshop to sharpen your images selectively, understanding the zoom level based on your photo’s use, customizing Unsharp Mask settings for each photo, and using advanced tools like Photoshop plugins for extremely blurry images.
Sharpening Selective Parts of the Image with Layer Masking
Layer masking in Photoshop is a powerful tool that allows you to apply effects such as sharpening to specific parts of an image and leave the rest of the image alone. When using the Unsharp Mask applying it to the entire image will often result in over sharpening especially in areas that are supposed to be soft or out of focus.
To prevent this create a layer mask by selecting your sharpening layer and click on the “Add Layer Mask” button at the bottom of the Layers panel (it’s the icon that looks like a rectangle with a circle inside). With the layer mask selected you can paint over the areas you want to exclude from the sharpening effect with a black brush. If you make a mistake simply paint over the area with a white brush to include it back in the effect. Layer masks provide a non destructive way to fine tune your sharpening and allow you to focus the effect on your subject while leaving the background blurred.
Zoom Level
Zooming in to inspect every pixel of your image, also known as “pixel peeping”, can lead to an obsession with perfect sharpness. You need to know the use of your photo before you get too caught up in this.
For images that will be shared on social media platforms like Instagram or Facebook perfect sharpness at a pixel level is not important as these images are often viewed on small screens where minor blur won’t be noticeable. So you don’t need to zoom in too much to check for blur.
But if you plan to print the photo especially in large format then more attention to sharpness and details is required. In this case use the Unsharp Mask more aggressively and check the image at a closer zoom level.
Customizing Unsharp Mask for Each Photo
Every photo is unique so are the settings to sharpen it. There is no one size fits all when it comes to using the Unsharp Mask.
The “Amount”, “Radius” and “Threshold” of the Unsharp Mask can be adjusted to suit the image you are working on. Start with the amount and threshold and then adjust the radius. If the effect is not what you want then feel free to tweak these settings again until you get the right balance.
Remember over sharpening can look artificial and even introduce noise and artifacts into the image. This is because the Unsharp Mask works by increasing contrast at the edges in your image. So while sharpening can enhance detail it’s important not to over do it.
Using Photoshop Plugins for Highly Blurred Images
Sometimes the amount of blur in an image is too much for the Unsharp Mask to handle. In these cases using a third party software or Photoshop plugin can be helpful.
Topaz Sharpen AI is one such software that uses artificial intelligence to sharpen blurry images. With options to customize the amount of sharpening based on the amount of blur in your image this can be a useful tool to rescue very blurry photos. Remember these tools have their own learning curve but can be a lifesaver for turning unusable shots into workable images.
How to Avoid Blurry Images in the Field
Pay Attention to Shutter Speed: When shooting in low light where you will be lengthening the shutter speed to add more light one general rule of thumb is to not have a slower shutter speed than your focal length. This is especially important when shooting handheld.
Shoot with a Tripod: As much as you may dislike using a tripod this is a great way to get a sharp photo. Using a tripod forces you to slow down and compose your shot and then focus on your scene. Once you focus on a tripod you can turn off autofocus (if shooting a non-moving subject) so the camera doesn’t hunt for focus every time you take a shot.
Use Image Review: Review your photos in the field using Image Review to check if they are sharp. Most cameras have the ability to zoom in to the photo on the back LCD screen. By zooming in you can see any focus or composition issues.
Use Eye AF if available: Many newer cameras have Eye Autofocus. This is a new technology that detects the eyes of people and animals to ensure the eye is in focus. This will help you get perfect focus and avoid blur in your photo.
Still Stuck? Our Team Can Help
Photo editing can be intimidating especially when dealing with blurry images. In these cases the design team at CustomStickers is here to help. Our experienced and creative designers are well versed in using advanced photo editing software like Photoshop to get your photos to look exactly how you want.
Whether you shot a photo for a custom sticker or need help with images for your sticker collection our team can handle it. They can fix blurry images, adjust color balance, contrast and more to get your stickers looking perfect.
Final Thoughts
Fixing blurry photos in Photoshop is not always a sure thing but it can help with slightly blurry images. Always try to avoid blur in the first place by paying attention to your settings when shooting. But if you do end up with a blurry photo remember these tips and don’t be too hard on yourself.
Practice makes perfect!
FAQs
Can I fix an extremely blurry photo in Photoshop? While you can enhance slightly blurred images in Photoshop, it may be challenging to fix an extremely blurry photo. In such cases, a third-party software like Topaz Sharpen AI may be more effective.
What does the Unsharp Mask do in Photoshop? The Unsharp Mask is a tool in Photoshop that sharpens an image by increasing contrast along the photo's edges.
Is it better to avoid blurry photos or fix them later in Photoshop? It's always better to avoid blurry photos in the first place by using the correct camera settings and techniques. However, if a photo turns out to be slightly blurry, you can attempt to fix it in Photoshop.
Does using a tripod help in avoiding blurry pictures? Yes, using a tripod can help avoid blurry photos. It keeps the camera stable, allowing for sharper images, especially in low-light conditions where slower shutter speeds are required.
What is Eye Autofocus and how can it help me? Eye Autofocus is a feature found in many newer cameras. It automatically focuses on the eyes of people and animals in the frame, ensuring a sharp focus and helping to avoid blurry photos.